Apps like Linear and Figma are popular for their “local-first” design. When using these apps, you are able to see changes instantly without any delay due to a request being sent to a server.
Creating an app like one of those is really hard because we need to worry about things like CRDT, authorization, privacy and syncing. In this article, we will focus on solving the latter.
What is Local-first?
The local-first (also known as offline-first) design means that all of the application data will be written and read first from our own device and replicated in the server later.
For example, see the code below of a To-Do Example using the Local Storage API as storage.
function saveToDoItem(item) {
  // Read all saved todos
  const todos = JSON.parse(localStorage.getItem('todos'))

  // Push in the array
  todos.push(item)

  // Save again
  localStorage.setItem('todos', JSON.stringify(todos))

  // Request to our remote endpoint
  saveInRemoteDatabase('...')
    .then(() => {
      // Success!
    })
    .catch(() => {
      // Delete the item from localStorage
    })

  // Returning so we can render the new element in screen
  return todos
}
This function will save the item to our localStorage, send a request to
our remote Database/API and return the new list (before the request even
completes). If the request fails, the data will be deleted from our storage.
If your use case is simple or even a single-player app, this approach can solve local-first for you, but if you need to scale, you are going to need more than that.
First Issue: Scaling Local Data
When dealing with local data, you might want a better API to deal with queries
and mutations instead of using localStorage. We can use one of the following:
SQLocal
Powered by Origin Private Filesystem (OPFS) and WebAssembly, SQLocal is a SQLite version you can use in browser and keep the data local. You can even use it with ORMs like Drizzle and Kysely.
import { SQLocal } from 'sqlocal'

// Create a client with a name for the SQLite file to save in
// the origin private file system
const { sql } = new SQLocal('database.sqlite3')

// Use the "sql" tagged template to execute a SQL statement
// against the SQLite database
await sql`
  CREATE TABLE groceries (
    id INTEGER PRIMARY KEY AUTOINCREMENT,
    name TEXT
  )
`

// Execute a parameterized statement just by inserting
// parameters in the SQL string
const items = ['bread', 'milk', 'rice']

for (let item of items) {
  await sql`INSERT INTO groceries (name) VALUES (${item})`
}

// SELECT queries and queries with the RETURNING clause will
// return the matched records as an array of objects
const data = await sql`SELECT * FROM groceries`
console.log(data)
PGlite
Also powered by WebAssembly, PGlite is a browser/in-memory version of Postgres, one of the most used SQL databases around the world.
import { PGlite } from '@electric-sql/pglite'

// Creating a client storing in IndexedDB
const db = new PGlite('idb://my-pgdata')

// Initial schema and data
await db.exec(`
  CREATE TABLE IF NOT EXISTS todo (
    id SERIAL PRIMARY KEY,
    task TEXT,
    done BOOLEAN DEFAULT false
  );

  INSERT INTO todo (task, done) VALUES (
    'Install PGlite from NPM',
    true
  );
`)

// Selecting our data
const result = await db.query(`
  SELECT * from todo WHERE id = 1;
`)
console.log(result.rows)
PGlite provide features like NOTIFY and LISTEN that enable live queries
directly in your browser.
import { useLiveQuery } from '@electric-sql/pglite-react'

const MyComponent = () => {
  const maxNumber = 100
  // It will update whenever my_table changes
  const items = useLiveQuery(`
    SELECT *
    FROM my_table
    WHERE number <= $1
    ORDER BY number;
  `, [maxNumber])

  return (
    <>
      {
        items.map((item) =>
          <MyItem item={item} />
        )
      }
    </>
  )
}
Dexie.js
Dexie.js is a wrapper around the IndexedDB API and it’s going to be our choice for the Sync Engine.
const db = new Dexie('MyDatabase')

// Declare tables, IDs and indexes
db.version(1).stores({
	friends: '++id, name, age'
})

// Find some old friends
const oldFriends = await db.friends
  .where('age').above(75)
  .toArray()

// or make a new one
await db.friends.add({
  name: 'Camilla',
  age: 25,
  street: 'East 13:th Street',
  picture: await getBlob('camilla.png')
})
It also provides live queries like PGlite:
import { useLiveQuery } from 'dexie-react-hooks'
import { db } from './db'

export function FriendList() {
  const friends = useLiveQuery(async () => {
    //
    // Query the DB using our promise based API.
    // The end result will magically become
    // observable.
    //
    return await db.friends
      .where('age')
      .between(18, 65)
      .toArray()
  });

  return <>
    <h2>Friends</h2>
    <ul>
      {
        friends?.map(friend =>
          <li key={friend.id}>
            {friend.name}, {friend.age}
          </li>
        )
      }
    </ul>
  </>
}
Second issue: Handling server side
When building a server side for your local-first app you are going to need:
Realtime communication
We need to handle realtime communication between the server and our clients, so we can use SSE (Server-Sent Events), WebSockets (our choice here) or even third-party apps like AWS AppSync.
const websocket = new WebSocket('...')

websocket.addEventListener('message', (message) => {
  console.log('message incoming: ', message)
})
Pub/Sub
When you want to message multiple clients when a certain event occurs, you are going to need these clients subscribed to that event. For that, we are going to use Node.js Event Emitter. In complex apps, you might want to use something like Redis, Kafka or RabbitMQ.
const eventEmitter = new EventEmitter()

eventEmitter.on('test', () => {
  console.log('test event')
})

eventEmitter.emit('test')
Database
You’ll also need a database to be the single source of truth of your application even with data in your clients. We are going to use a memory store for sake of the example.
type Todo = {
  id: string
  content: string
  done: boolean
  createdAt: Date
}

const todos: Todo[] = []

const store = {
  todos: {
    list: () => {
      ...
    },
    create: () => {
      ...
    }
  }
}
0. Starting the project
To start the project, clone the repository in your workspace:
git clone https://github.com/matheuslanduci/sync-engine.git
It comes with a basic UI and a simple web server.
Now, change to the cloned directory and install the needed packages.
cd ./sync-engine
pnpm install
After setting up, you’ll see this file structure:
.
├── backend
│   └── src
│       ├── index.ts
│       └── db.ts
├── frontend
│   └── src
│       ├── App.tsx
│       └── main.tsx
└── package.json
Omitted files won’t matter by now
Our app is splitted in two: the server built with Hono, Node.js and TypeScript and the web client built with React and TypeScript.
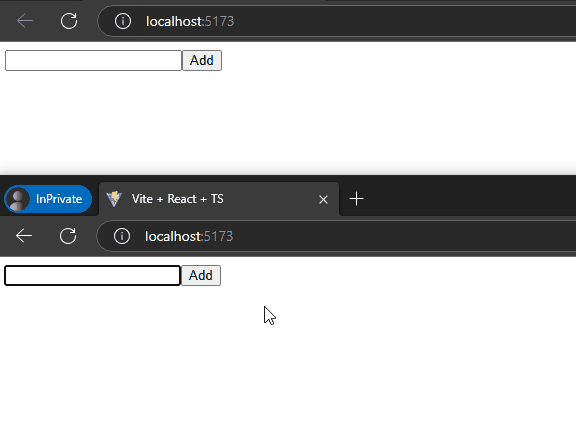
Start both dev servers running pnpm dev in their respective folders. If
everything goes correctly, you’ll see your backend running in
http://localhost:3000 and your frontend in
http://localhost:5173.
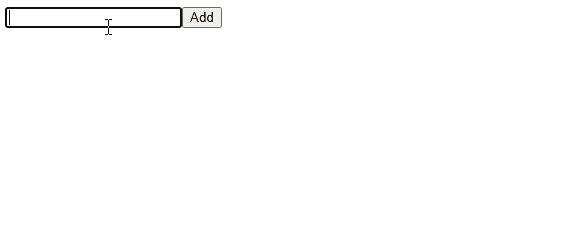
1. Adding persistent storage
If you try to add a new item, you’ll see that you are able to do so but the data is not persistent across page reloads.

To fix that, let’s begin installing Dexie.js in our frontend.
cd ./frontend
pnpm i dexie dexie-react-hooks
Now, we create the database in our App.tsx file:
Note: In local-first, our IDs are always created in client-side and
in our case, we are going to use nanoid.
// Import stuff
import Dexie, { type EntityTable } from 'dexie' // [!code ++]

...

type Todo = {
	id: string
	content: string
	done: boolean
	version: number
	clientId: string
	createdAt: Date
}

const clientId = nanoid()

// Create the database with strong types
const db = new Dexie('todos') as Dexie & { // [!code ++]
	todos: EntityTable<Todo, 'id'>  // [!code ++]
} // [!code ++]

// Create a todo table with provided indexes
db.version(1).stores({  // [!code ++]
	todos: 'id, clientId, version'  // [!code ++]
})  // [!code ++]

...
The code we just typed is really simple - we are creating a instance of Dexie
(strongly typed) attached to a IndexedDB called todos. Then we are creating a
todos table within our IndexedDB instance with id as primary key and
clientId/version as secondary indexes.
Refactoring
Now we need to refactor our code to use our Dexie instance instead of the
useState hook.
First, replace the useState hook to use the useLiveQuery hook instead.
const [todos, setTodos] = useState<Todo[]>([]) // [!code --]
const todos = useLiveQuery(() => db.todos.toArray()) // [!code ++]
Our todos will be live, so whenever a item is inserted, updated or deleted,
React is going to render again.
Now remove the addTodo function and update the onSubmit to the use Dexie
instead.
const addTodo = (content: string) => {// [!code --]
	const todo = {// [!code --]
    id: nanoid(),// [!code --]
    content,// [!code --]
    done: false,// [!code --]
    createdAt: new Date(),// [!code --]
    version: todos.length,// [!code --]
    clientId// [!code --]
  }// [!code --]
  // [!code --]
  setTodos([...todos, todo])// [!code --]
}// [!code --]

const onSubmit = async (e: React.FormEvent<...>) => {// [!code ++]
  e.preventDefault()

  const formData = new FormData(e.target as HTMLFormElement)

  const content = formData.get('content') as string

  const todo: Todo = {// [!code ++]
    id: nanoid(),// [!code ++]
    content,// [!code ++]
    done: false,// [!code ++]
    createdAt: new Date(),// [!code ++]
    version: todos?.length ?? 1,// [!code ++]
    clientId// [!code ++]
  }// [!code ++]

  e.currentTarget.reset()

  await db.todos.add(todo)// [!code ++]
}
The code above is async but the changes are instant, so you shouldn’t be worried about that.
Now let’s move to the HTML part. Let’s include the update on the checkbox and a new button to delete the item.
{todos?.map((todo) => (// [!code ++]
  <li key={todo.id}>
    <input
      type="checkbox"
      checked={todo.done}
      onChange={async (e) => {// [!code ++]
        await db.todos.update(todo.id, { // [!code ++]
          done: e.target.checked // [!code ++]
        })// [!code ++]
      }}// [!code ++]
    />
    {todo.content}

    <button // [!code ++]
      type="button"// [!code ++]
      onClick={async () => {// [!code ++]
        await db.todos.delete(todo.id)// [!code ++]
      }}// [!code ++]
    >// [!code ++]
      Delete// [!code ++]
    </button>// [!code ++]
  </li>
)}
As you can see, the API to mutate the data is clean and neat! Let’s see in our browser.
One problem: our items are not sorted! Let’s change our useLiveQuery hook.
const todos = useLiveQuery(() => db.todos.toCollection().sortBy('createdAt'))
Instead of getting all of our items, first we transform in a collection and
then we use the sortBy method.
2. Sending to server
Our items is stored in local, now we have to move on to the next step: sending to server.
In order to do that, we are going to dispatch a CustomEvent with our item as
arg after every mutation.
const todo: Todo = {
  id: nanoid(),
  content,
  done: false,
  createdAt: new Date(),
  version: todos?.length ?? 1,
  clientId
}

e.currentTarget.reset()

await db.todos.add(todo).then(() => {// [!code ++]
  window.dispatchEvent(// [!code ++]
    new CustomEvent('item:put', {// [!code ++]
      detail: { todo }// [!code ++]
    })// [!code ++]
  )// [!code ++]
})// [!code ++]
<input
  type="checkbox"
  checked={todo.done}
  onChange={async (e) => {
    await db.todos.update(todo.id, { done: e.target.checked })

    window.dispatchEvent(// [!code ++]
      new CustomEvent('item:put', {// [!code ++]
        detail: { todo }// [!code ++]
      })// [!code ++]
    )// [!code ++]
  }}
/>
<button
  type="button"
  onClick={async () => {
    await db.todos.delete(todo.id)

    window.dispatchEvent(// [!code ++]
      new CustomEvent('item:delete', {// [!code ++]
        detail: { todo }// [!code ++]
      })// [!code ++]
    )// [!code ++]
  }}
>
  Delete
</button>
Later, when our server is ready, we’ll create listeners to send to server.
3. Realtime
Moving to our server file, we must configure our WebSocket handler.
First, we need to create a Map and assign each of our clients when they
connect to our server.
import type { WSContext } from 'hono/ws'// [!code ++]

const clients = new Map<string, WSContext>()// [!code ++]

app.get(
	'/ws',
	upgradeWebSocket((c) => ({
		onOpen: (evt, ws) => {
			const clientId = c.req.query('clientId') ?? 'unknown'// [!code ++]
			clients.set(clientId, ws)// [!code ++]
            console.log(`Client connected: ${clientId}`) // [!code ++]
		},
		onClose: (evt, ws) => {},
		onMessage: (evt, ws) => {}
	}))
)
Let’s write the onMessage handler now.
onMessage: (evt, ws) => {
  const clientId = c.req.query('clientId') ?? 'unknown'
  const message = JSON.parse(evt.data.toString())

  switch (message.event) {
    case 'item:put': {
      const todo = message.todo

      if (db.todos.read(todo.id)) db.todos.update(todo.id, todo)
      else db.todos.create(todo)

      for (const [, client] of clients) {
        client.send(
          JSON.stringify({
            event: 'item:put',
            todo
          })
        )
      }

      console.log(`Client ${clientId} put todo: ${todo.id}`)
      break
    }
    case 'item:delete': {
      const todo = message.todo

      if (db.todos.read(todo.id)) db.todos.delete(todo.id)

      for (const [, client] of clients) {
        client.send(
          JSON.stringify({
            event: 'item:delete',
            todo
          })
        )
      }

      console.log(`Client ${clientId} delete todo: ${todo.id}`)
      break
    }
    default: {
      console.log(`Client ${clientId} sent unknown event: ${message.event}`)
      break
    }
  }
}
In this code we transform the event data (originally a Blob) in a string and
parse as a JSON object. Then we get the event and switch between the type of
it.
ìtem:put
If the item already exists, we update, otherwise we create. We also emit the event to our clients insert the item.
item:deleted
If the item already exists, we delete otherwise we do nothing. After we emit the event to our clients so they can delete.
Back in the frontend
Now, in the frontend, connect to your backend in the top of the file:
const ws = new WebSocket(`ws://localhost:3000/ws?clientId=${clientId}`)
Then register the event listeners when our client is ready:
ws.addEventListener('open', () => {
  console.log('Connected to server')

  window.addEventListener('item:put', (e) => {
    const todo = (e as CustomEvent<{ todo: Todo }>).detail.todo

    ws.send(
      JSON.stringify({
        event: 'item:put',
        todo
      })
    )
  })

  window.addEventListener('item:delete', (e) => {
    const todo = (e as CustomEvent<{ todo: Todo }>).detail.todo

    ws.send(
      JSON.stringify({
        event: 'item:delete',
        todo
      })
    )
  })

  ws.addEventListener('message', async (e) => {
    const message = JSON.parse(e.data)

    switch (message.event) {
      case 'item:put': {
        const todo = message.todo

        if (await db.todos.get(todo.id)) db.todos.put(todo)
        else db.todos.add(todo)

        console.log(`Server put todo: ${todo.id}`)
        break
      }
      case 'item:delete': {
        const todo = message.todo

        if (await db.todos.get(todo.id)) db.todos.delete(todo.id)

        console.log(`Server delete todo: ${todo.id}`)
        break
      }
      default: {
        console.log(`Server sent unknown event: ${message.event}`)
        break
      }
    }
  })
})
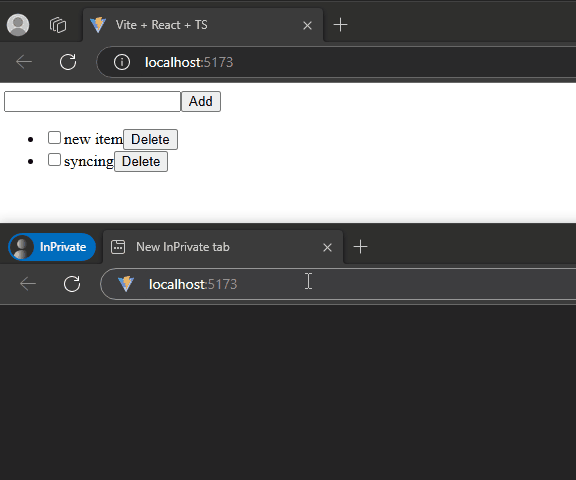
The code above listens to our local events: item:put and item:deleted
dispatching them to our WebSocket channel. We also listen to the message
(from WebSocket in this case) where we have the code very similar to the
backend.
As you can see, our two different browsers are now connected through the websocket events.
Well, now there are only two things missing: Initial state and online sync.
4. Initial state and online sync
What if our users just connected to the app? They won’t see any items! For that, we need to load the initial state for our app.
In order to do that, we need to send a request to our backend with all local stored items and in the backend handle the differences.
In our main backend file, place the following code:
app.post('/sync', async (c) => {
  const body = await c.req.json()

  const items = body.items as Todo[]

  for (const item of items) {
    if (db.todos.read(item.id)) db.todos.update(item.id, item)
    else db.todos.create(item)
  }

  const todos = db.todos.list()

  const missingItems = todos.filter(
    (todo) => !items.find((item) => item.id === todo.id)
  )

  return c.json({ items: missingItems })
})
Now in our frontend, we’ll place the useEffect hook in the body of our
component.
useEffect(() => {
  async function sync() {
    const response = await fetch('http://localhost:3000/sync', {
      method: 'POST',
      headers: {
        'Content-Type': 'application/json'
      },
      body: JSON.stringify({
        items: await db.todos.toArray()
      })
    })

    const { items } = await response.json()

    for (const todo of items) {
      if (await db.todos.get(todo.id)) db.todos.put(todo)
      else db.todos.add(todo)
    }
  }

  sync()
}, [])
The code above will sync whenever we enter on the screen again. You can also monitor the internet connection to sync whenever the user connects again.
Important: our app won’t cover to sync deleted items cause I forgot 😢.
Ideally, we should have a deletedAt field so we know that specific item was
deleted.
Also, there are better ways to sync the differences - check the link below if you want to know more about local first design.
- https://localfirstweb.dev/ - there are several content, techs and talks about local-first.
Conclusion
Building a sync engine involves different steps:
- Caring about the local data;
- Handling realtime updates;
- Ensuring new data is handled;
This was just our first step to understand local-first apps! Hope you were able to learn as much I did writing this article.
Check the final version in the final branch in the
GitHub.